

How To Be Good Drawer
This is your complete guide on how to build a drawer. See all the tips and tricks you need to know to build perfect drawers every time – even for beginners!
PIN THIS TO PINTEREST
Building drawers are almost like a rite of passage going from beginner woodworker to more intermediate woodworker.
I won't lie.
Building drawers still stress me out – every single time!
But I don't try to stay away from them anymore.
My journey learning to build drawers –
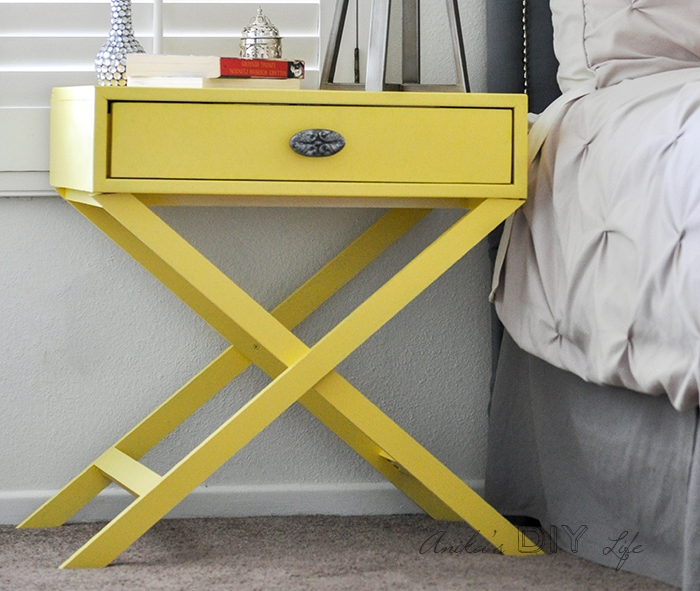
The very first time I built a drawer was for this X-leg accent table. I was just so glad it didn't use drawer slides because that would have been completely unforgiving to being even slightly off square. (Goes to show how little confidence I had in my builds ;))
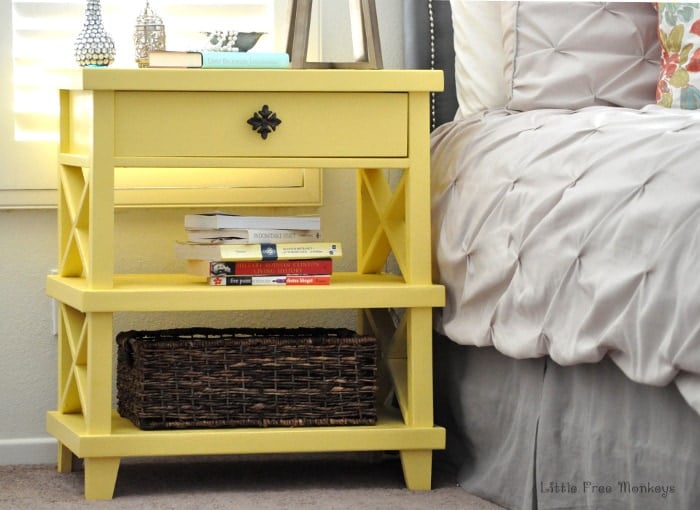
The next build that used drawers Clara bedside table. It took me forever and 3 versions of the drawer box to finally get that one drawer to work!
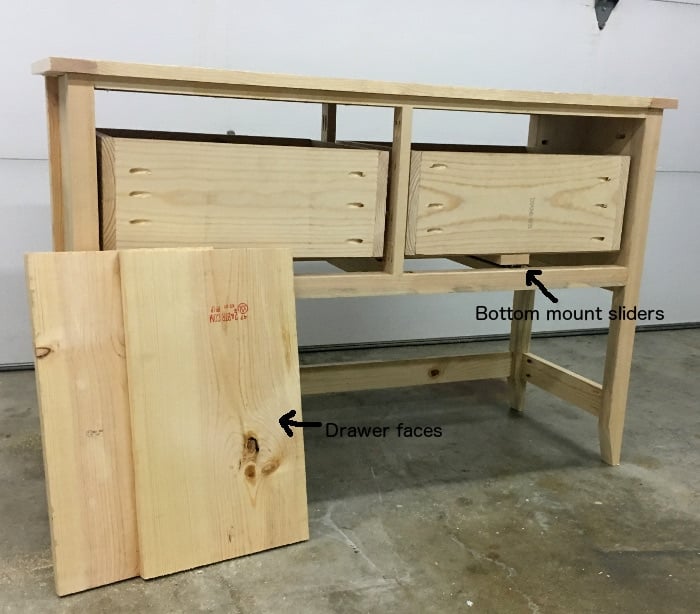
Then came the mirrored console table. I had built up a bit of confidence to get the drawers to work… but unfortunately, that would not be the case.
After spending 2 full days trying to get the drawers to work, I gave in and bought bottom mount drawer slides which were forgiving to the drawers being off-square.
Then came the Emerson buffet and it changed my life! I mean my drawer building life. I was extra super duper careful from the very beginning about keeping everything super duper square and it worked!!
The very first time!!
Well, at least one of them did. The other one had to go through a few modifications before it worked.
But that was progress… and after that, I have been getting better and better at drawers!
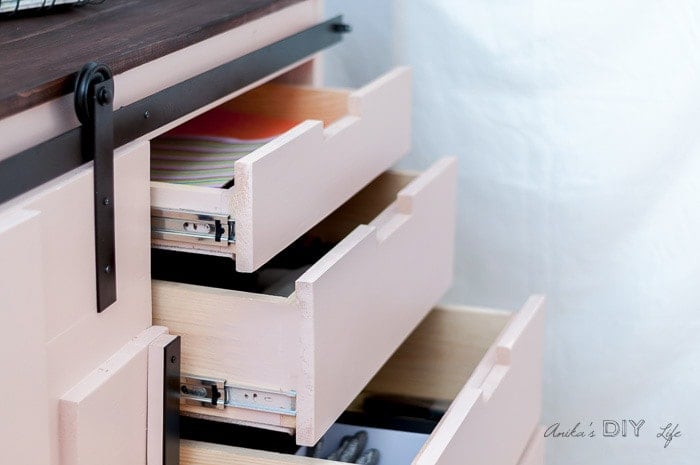
I recently built the huge Barn door storage cabinet with 4 drawers and they all worked the very first time!
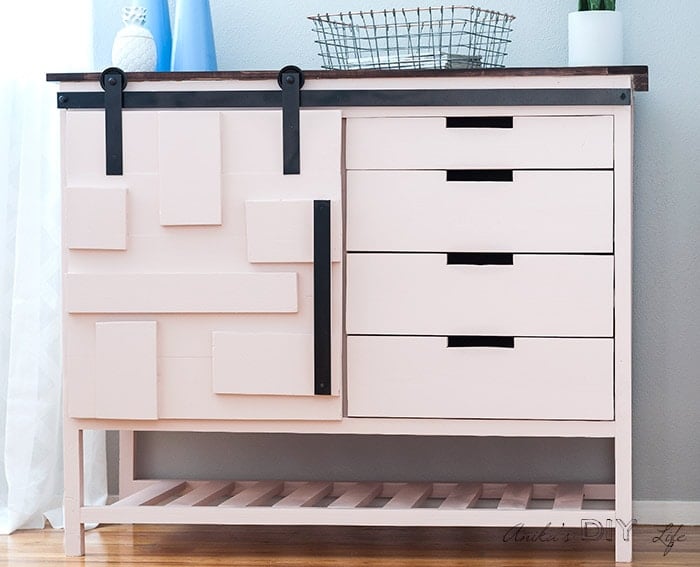
I think I have finally discovered the little tips and tricks that make building drawers foolproof!
***This post contains affiliate or referral links. It is a way for this site to earn advertising fees by advertising or linking to certain products and/or services. Please read my full disclosure here ***
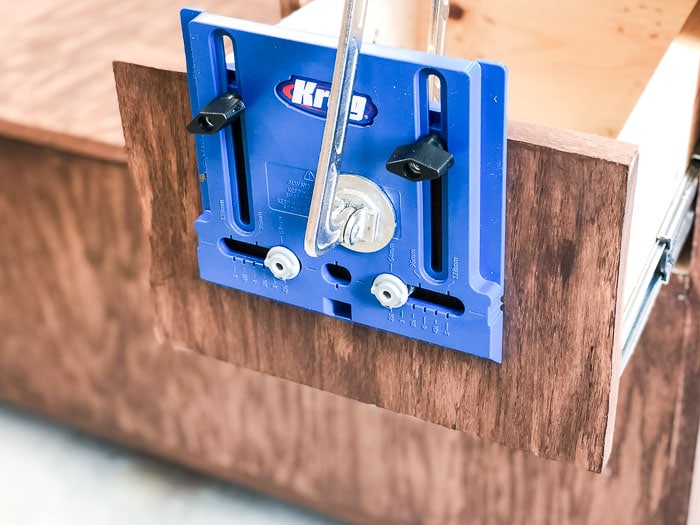
How to build a sliding drawer using Kreg Jig
Building a drawer box using a Kreg Jig is very straightforward and easy. I am assuming you are using ¾" thick stock.
- Decide the dimensions of the drawer box. You have to take into account the size of the drawer slides and decide the width accordingly. The drawer slide should come with information on that.
- Subtract 1½" from the width to come up with the size of wood to cute for the width. The depth of the drawer box will depend on the project.
- Cut opposite sides the same exact lengths. This is VERY important. Measure 4 times, cut once.
- Build the drawer box using wood glue and 1 ¼" pocket hole screws keeping all the sides square. See below for tips and tricks to make this foolproof.
- Glue and nail a ¼" plywood base cut to size of the drawer box. This is the drawer box base.
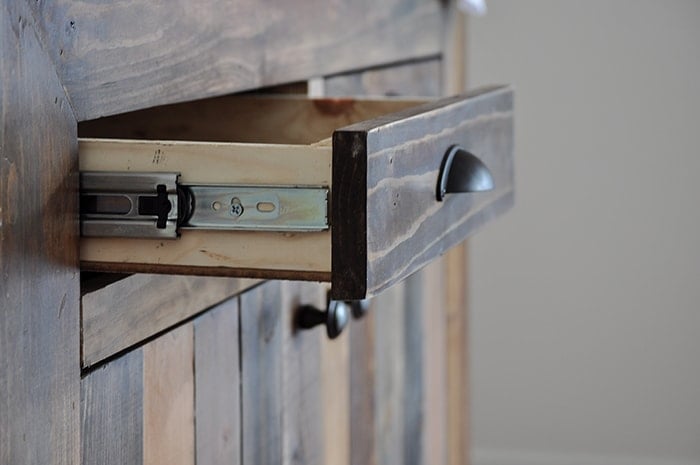
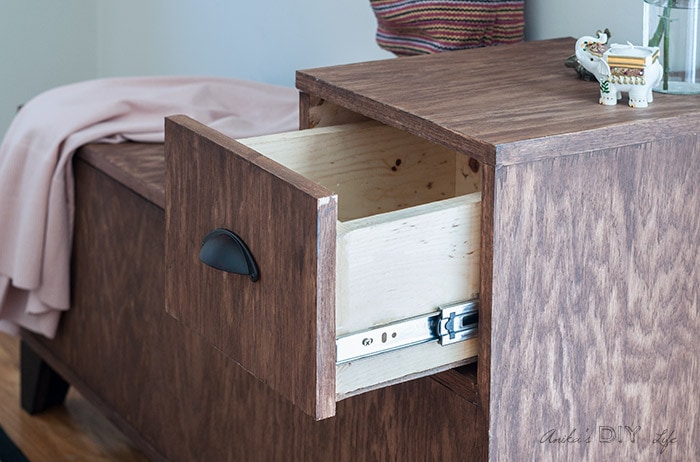
- Attach the drawer slides to the drawer box and the cabinet frame.
- Attach the drawer face leaving ⅛″ gap on all sides using wood glue and finish nails and clamp it well.
PIN THIS TO PINTEREST
Although I am using a Kreg Jig to build this drawer, the basic principles are the same using any other joinery method.
RELATED: How to use a Kreg Jig
Now that you know the basics of how to build a simple drawer, let's talk about making it super easy to bet it square and installed in no time!
Tips and tricks to build and install perfect drawers –
It is not just about building the perfect drawer. It is also about getting it all done fast!
1. Measure 4 times, cut once
I know you have heard this a lot but do you always follow it one hundred percent?
Or maybe it might be just me because when I am too tired or running behind on a project, I just go for it. I have learned the hard way to not do that ever!
2. Use an assembly square
Using an assembly square to build the project makes a huge difference in making sure everything is square in the cabinet and ready for the drawers! Also, the right angle clamp from Kreg is very useful too!
3. Use a corner clamping jig
You could build your corner jig using scrap wood or get this corner clamping jig which has been the best addition to my workshop!
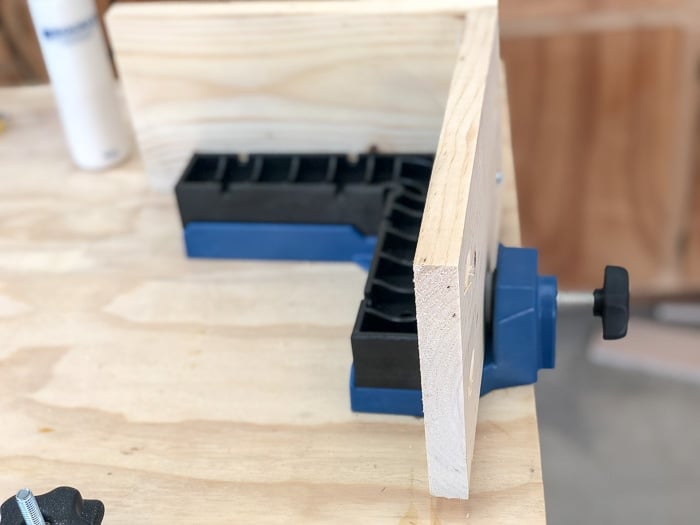
I use this along with the assembly square to build drawer boxes to ensure that they are perfectly square every single time!
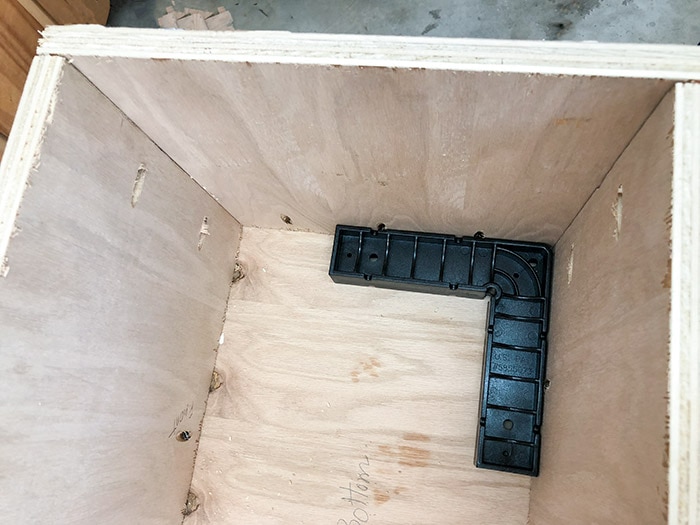
4. Attach drawer base BEFORE removing the corner jig
You built the perfect square drawer but when you install the base, it goes out of square. It happens!
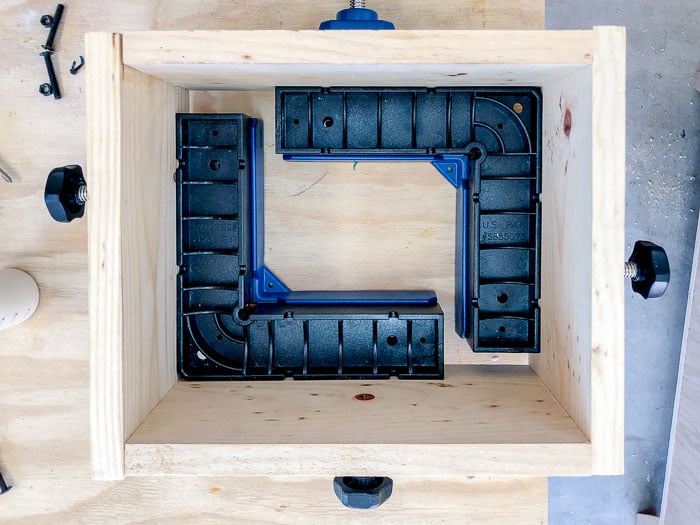
I have had this happen a couple of times. So make sure to attach the base to the drawer box while the corner clamping jig is still holding the drawer together!
5. Use a drawer slide jig to attach the drawer slides
Remember we are talking about making everything quick and foolproof?
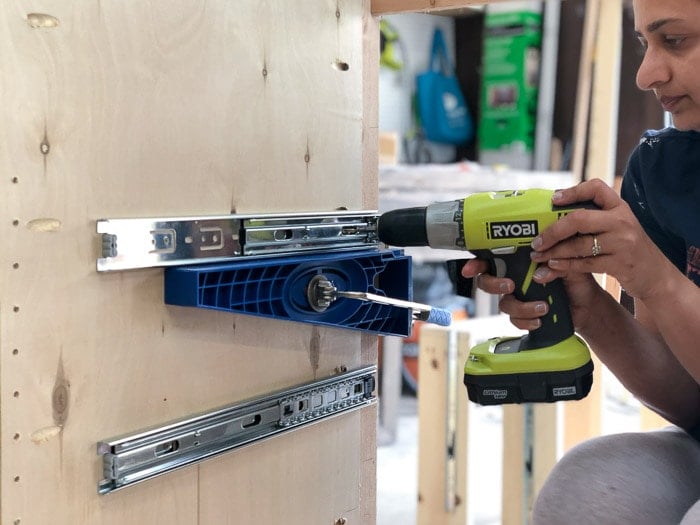
I love this drawer slide jig! It makes installing drawer slides so easy! First, you clamp them to the cabinet frame and install the slides.

Then, rest the drawer on the jig on both sides, extend the slide and attach to the drawer. That is it!!
The only measuring you need to do is where to install the slide on the cabinet. No levels needed either!
6. Use the playing card trick
The drawer is in and next is the drawer face. The drawer face should have a ⅛″gap around it for smooth operation.
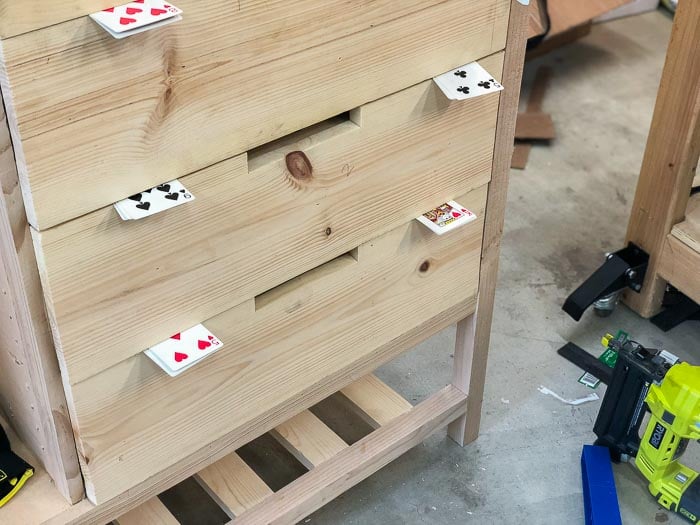
To make sure it holds up, I use this trick I read about a long time ago – use playing cards. About 7 playing cards make the ⅛″ thickness and 52 playing cards give you lots of equal spacers for any build!
No playing card? Try these reusable spacers. I love using these for various projects!
7. Use a hardware jig to attach hardware
This last tip isn't exactly specific to drawers but I wish I had discovered this hardware jig before installing all the knobs and pulls I have in the past. It made installing the hardware super easy and perfect!
So, there you have it… my entire brain dump on how to build a drawer and install it quickly and perfectly!
I hope you find these tricks and tips helpful! Do you have any specific tricks that I might have missed? Share in the comments!
PIN THIS TO PINTEREST
Materials
- Lumber as needed to build project
- Drawer slides as needed by project. I like full extension ball bearing slides.
Instructions
- Decide the dimensions of the drawer box. You have to take into account the size of the drawer slides and decide the width accordingly. Check drawer slide packaging for this information.
- If using ¾" stock, subtract 1½" from the width to come up with the size of wood to cute for the width. The depth of the drawer box will depend on the project.
- Cut opposite sides the same exact lengths. This is VERY important. Measure 4 times, cut once.
- Build the drawer box using wood glue and 1 ¼" pocket hole screws keeping all the sides square. Use a corner assembly square for this or a Corner clamp.
- Glue and nail a ¼" plywood base cut to size of the drawer box. This is the drawer box base.
- Attach the drawer slides to the drawer box and the cabinet frame. A drawer slide jig is really helpful to install the drawers quickly and level.
- Attach the drawer face leaving ⅛" gap on all sides using wood glue and finish nails and clamp it well. See the playing card trick above!
Notes
These instructions are based on using ¾" stock.
Reader Interactions
How To Be Good Drawer
Source: https://www.anikasdiylife.com/how-to-build-a-drawer/
Posted by: riversmally1961.blogspot.com
0 Response to "How To Be Good Drawer"
Post a Comment